
In the world of gaming, having the right setup can make all the difference. Whether you’re a casual gamer or a competitive esports player, building your own gaming PC can be an incredibly rewarding experience. Not only does it allow you to customize your hardware to meet your specific gaming needs, but it can also save you money compared to buying pre-built systems. This guide will take you through the essential steps and considerations for creating your ultimate gaming rig.
Understanding Your Gaming Needs

Before diving into the components of a gaming PC, it’s crucial to understand your gaming needs. Are you focused on high-end graphics for AAA titles, or do you prefer a system that can handle competitive online games? Knowing what games you want to play and at what settings will help you determine which components are necessary.
For instance, if you’re looking to play the latest titles at 4K resolution with ultra settings, you’ll need to invest in a powerful GPU and a fast CPU. On the other hand, if your gaming is more focused on less demanding games, you might get away with mid-range components.
Once you have a clear understanding of your gaming preferences, you can start researching the best components that fit your needs. Websites like gaming PC builder can help you compare prices and specifications of various parts.
Choosing the Right Components
The heart of any gaming PC lies in its components. Here are the key parts you’ll need to consider:
- Processor (CPU): This is the brain of your PC. Look for CPUs with higher clock speeds and more cores if you want better performance. Popular choices include Intel’s Core i5 or i7, and AMD’s Ryzen 5 or 7.
- Graphics Card (GPU): This is perhaps the most crucial component for gaming. A powerful GPU will significantly enhance your gaming experience. Brands like NVIDIA and AMD offer various options tailored to different budgets.
- Memory (RAM): Aim for at least 16GB of RAM for gaming. This ensures smooth multitasking and gaming performance.
- Storage: Consider a combination of SSDs and HDDs. SSDs provide faster load times, while HDDs can offer more storage at a lower price.
- Motherboard: Ensure compatibility with your CPU and other components. Look for features like USB ports and expansion slots that suit your needs.
When selecting components, it’s essential to strike a balance between performance and budget. Over time, you may want to upgrade certain parts, so choose a motherboard that allows for future expansion.
Building Your Gaming PC
Once you have all your components, it’s time to assemble your gaming PC. Here’s a step-by-step guide:
- Prepare Your Workspace: Ensure you have a clean, static-free environment to work in. Gather all your tools, including a screwdriver and anti-static wrist strap.
- Install the CPU: Carefully place the CPU into the motherboard socket, following the manufacturer’s instructions. Lock it in place.
- Add RAM: Insert the RAM modules into the appropriate slots on the motherboard.
- Mount the Motherboard: Place the motherboard into the case and secure it using screws.
- Install the GPU: Insert the graphics card into the PCIe slot on the motherboard and secure it.
- Add Storage: Mount SSDs and HDDs in the designated slots and connect the necessary cables.
- Connect Power Supply: Install the power supply unit (PSU) and connect all necessary power cables to the motherboard and components.
- Final Checks: Ensure all connections are secure and that there are no loose cables. Close the case and prepare for the first boot.
Building your gaming PC can be a complex process, but taking it step by step can make it easier. There are numerous tutorials available online to guide you through specific parts of the build.
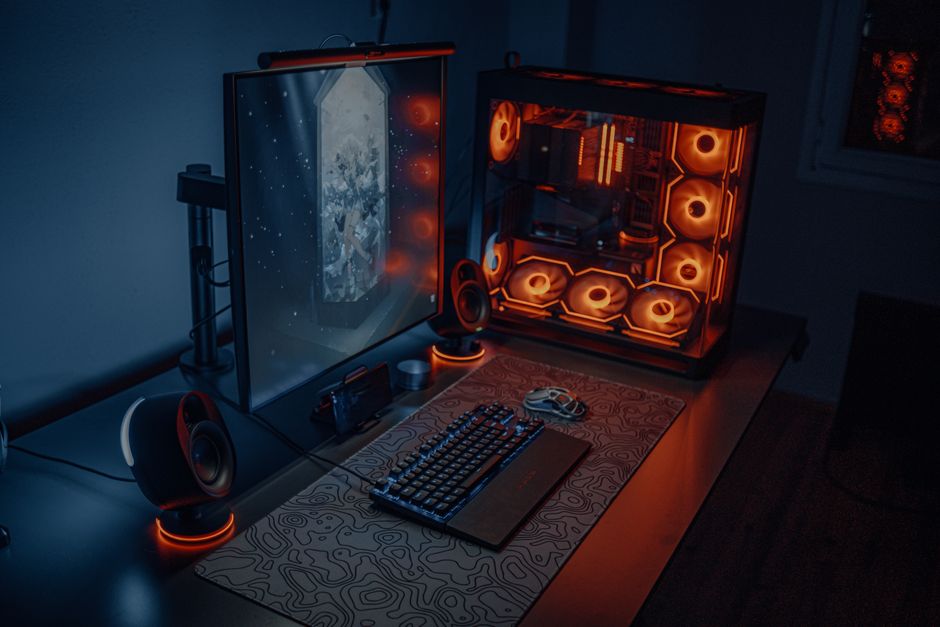
Setting Up Your Gaming Environment
After successfully assembling your gaming PC, it’s time to set up your gaming environment. This includes choosing the right monitor, peripherals, and accessories that complement your new system.
For monitors, consider options with high refresh rates and low response times for competitive gaming. Brands like ASUS and Acer offer excellent gaming monitors that are designed for high performance.
Peripherals such as mechanical keyboards and gaming mice can enhance your gaming experience. Look for features like customizable RGB lighting and programmable keys that suit your gaming style.
Maintaining Your Gaming PC
Once your gaming PC is up and running, it’s essential to maintain it properly. Regular cleaning can help prevent overheating and ensure optimal performance. Dust can accumulate inside the case and on components, so consider using compressed air to blow out dust every few months.
Additionally, keep your drivers updated. Manufacturers regularly release updates that can optimize performance and fix bugs. Using software tools can help automate this process, making it easier to keep your system up to date.
Finally, consider monitoring your system’s performance using benchmarking tools. This can help you identify any potential issues and confirm that your PC is performing at its best.
Conclusion
Building your own gaming PC can be an exciting and fulfilling project. By understanding your needs, selecting the right components, and assembling them carefully, you can create a powerful machine tailored to your gaming style. With proper maintenance and an optimized setup, your gaming PC can provide you with countless hours of entertainment and performance. So gather your components, follow the steps outlined in this guide, and embark on the journey to create your ultimate gaming rig.